As Lexington homeowners Josh and Rachel Summers re-build/remodel their home, they are re-thinking every system and trying to find the right solution that is environmentally conscious, long-term maintainable, has reasonable operating costs, and most importantly will give them the living environment/experience they are looking for. They share what they’ve learned in the process:
As we are in the midst of our home #remodel one of the things we decided to invest heavily in during our #greenbuilding journey is ensuring we have a properly insulated home with a tight building envelope. Our house was built in the 1970s and any insulation that was original is long past effective. We are in a good position to completely rethink the insulation approach as we are gutting the house inside and out, including a full removal of all external siding / roofing, interior board and plaster, and all windows and doors. To keep this post to a reasonable length, I will describe the wall construction only here and perhaps tackle our unique roof construction in another post.
First a disclaimer:
I am not an engineer, environmentalist by training, architect or builder. I am a homeowner who has spent the time to dig in and try to make the best choices for our home and our family while keeping in mind our environmental impact. Your situation may be different than mine and thus this is more about my learnings than anything else. I apologize if I got anything wrong in here on the science / engineering side of things. Feel free to correct me in the comments.
Thermal Bridging:
A lot of the effort we took in the construction and insulation techniques we chose is aimed at reducing or even eliminating thermal bridging. Thermal bridging is the movement of heat across the most conductive parts of the structure, effectively negating some of the value of insulating your home using traditional techniques. This occurs most around windows and doors and in wall studs themselves where the inside of the house and the outside of the house are only separated by the wood. Wood conducts significantly more heat than insulation does. Thermal bridging is a major source of energy loss in homes leading to higher home heating and cooling costs.
R-Value:
An R-value is used to measure the effectiveness of your insulation approach. It is effectively the capacity at which a specific material can resist the flow of heat from one side of it to the other. The higher the R-value the more a product insulates. To determine the R-value of the wall assembly you can start by adding each layers R-value (usually specified as per inch of material so multiply by the thickness of the material). This can be slightly misleading though because R-values can vary based on the wall, whether or not there is a stud you are measuring through vs. the in-wall insulation, windows in the wall etc. For the purposes of making it simple though we will discuss R-value as if it is the maximum value in the wall if the entire wall was the same structure.
Our Wall Assembly:
There are many ways to build a wall and by no means am I saying our way is the best. We had to take into consideration an existing framing approach and how to augment that in the best way possible. Everything described here is above grade from the ground to the roof line. We did unique approaches for the basement as well depending on what was accessible (also including interior and exterior insulation), but I will not describe that in this post.
I will describle the structure of our wall from starting on the inside conditioned space and moving to the outside of the house. For certain layers I will add some details on the specific products we chose to use and why.
Layer 1: Interior walls are board and plaster. Nothing special here. Board and plaster adds an R-value of about .5 rounded. Pretty minimal.
Layer 2: Framing / Wall Cavity Insulation- Mostly 2×6 construction, however some parts of the older framing are 2×4. At the corners of the house where we were able to modify the framing, or where the new additions were being added, we used California Corners. A California Corner is a three stud corner for framing that allows you to add insulation further into the corner, behind the back side of the framing, thus reducing thermal bridging. Between the studs and into the California Corners we used closed cell insulation. This resists the flow of moisture through the wall and is densely packed with an R-value of 7 per inch. We used 3 inches of spray foam in the wall cavities. When considering spray foams, it is best to look at the low VOC / non-toxic versions. Over the years this product has become much greener and safer to install.
Layer 3: 1/2 CDX Plywood:
This is basically a plywood with a special glue that is better for exterior construction as it can withstand some moisture. The R-value of 1/2 inch CDX is also about .5 rounded. The plywood is there as our exterior sheathing. This strengthens the building and keeps it from moving.
Layer 4: Blue Skin Water Barrier:
This is pretty important. It is a vapor permeable but water resistant barrier that covers the outside of your sheathing. This means it will block rain from getting into the interior structure of your wall but allow water vapor (gas form) to move back out of the wall.
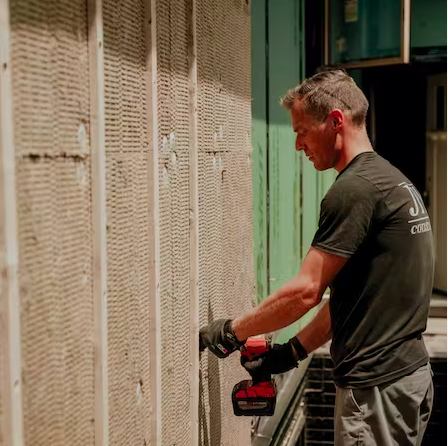
Layer 5: Exterior Insulation – Comfortboard-80
Up until this layer, things were pretty standard in our house. This is where it gets interesting. Outside of all the plywood and water barrier we used 3 inches of Comfortboard-80 insulation. Comfortboard-80 is made by Rockwool and is a semi-rigid stone wool board used to effectively wrap the entire exterior of the home (including corners). This product is made by taking slag waste from steel manufacturing and other sources and heating it to 1600° C and then spinning it in a cotton candy like machine. This produces a thread that is lightweight and gets combined together to make the insulation. This significantly reduces / eliminates thermal bridging through the wall (windows and doors are still an issue we will discuss soon). It has an R-value of 4.2 / inch so we have a total of 12.6 R-value in this layer of our wall construction. Rockwool products are great because they maintain all of their R-value even when wet and are very fire resistant.
Layer 6: Rainscreen Drainage / Air flow
The siding of your house is designed to keep most water off of your interior wall construction, but some does seep through or enter. A cavity area is created behind the siding to allow air and moisture to flow behind the siding and dry out after it gets wet. For ours we used marine grade plywood to strap the wall on top of the Comfortboard-80. This created a 1/2 inch gap. On top of this we used Yellow Obdyke (a plastic mesh) that helps migrate water down behind the siding and keeps the cavity open for air to flow. At the top and bottom of the walls we installed vents / bug screens to again enable air flow but block bugs from being able to crawl into the wall structure.
Layer 7: Outside cladding and trim
Our entire house is sided with a product called Richlite. It is a sustainable building material made of recycled paper and cardboard. It has been around since the 1940s and most people who know what it is think of it as either cutting boards, guitar fretboard, countertops or skateboard ramps (yes it is used extensively for this). We had it fabricated into traditional clapboard. It comes pre-dyed so you never need to paint it and is extremely stable (with minimal expansion or contraction). All of our trim is made from a product called Boral. This is a carbon encapsulation product as it is made out of coal ash – a bi-product of coal combustion that is a major pollutant. It is also dimensionally stable and not impacted by water.
So what about Installing Windows and Doors?
Windows and doors are a whole separate conversation – we went with double pane low-e argon filled sound resistant windows from Pella. They use varying sizes of glass to stop the movement of sound waves coming from the outside of the home to the inside. Rather than go deep on these products here, I will instead cover our installation approach. Because our house structure now has exterior insulation our walls are pretty thick. We need a surface to mount the windows and doors on the outside of the house (extending the mount to a flat plane with the exterior insulation) that is stable. Traditional construction takes 2x4s and creates what is called a wood buck. The problem with this is thermal bridging. We found a product called ThermalBuck which is made from expanded polystyrene covered in a VOC free resin. This stops the thermal bridging around windows and doors considerably improving the tightness of your building envelope.
So what does all this add up to and how do you measure it?
The total R-value we achieved when all is said in done is about 35 (compare this to the recommended R-value of 21 for our climate zone in MA.). More importantly by practically eliminating thermal bridging we have very tightly sealed our envelope and will definitely lower our HVAC costs. This does mean you need to consider makeup / fresh air with an ERV or HRV (again – a discussion for another day). The best way to know how well you insulated your building is to have a HERS rating calculated by an inspector. This stands for Home Energy Rating System and they audit your home and perform tests to confirm the energy performance of your home.
Feel free to let me know what I got wrong or provide thoughts in the comments. Would love to hear what others have done to insulate their homes and reduce their #carbonfootprint. #construction #homebuilding #renovation